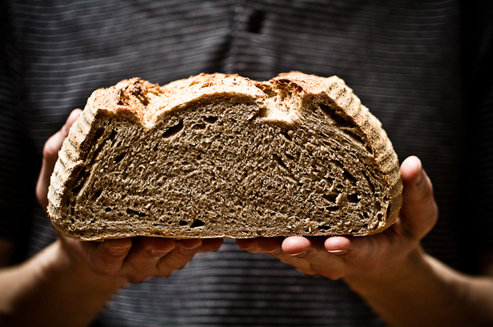
It’s been a long time since I baked my last bread and I must say I have missed it. For me home bread making is like a ceremony which I need to prepare myself to and which I need lots of space for. And yes, I missed it. I missed the way I made my starter ready, the way I worked with the dough and finally the way I carefully placed the final loaf onto a baking stone.
There is no need to possess any special power to bake your own bread at home. Believe me or not but baking bread at home is as simple as breathing. All you have to do is to be patient and believe in yourself. I have learned this from my friend Tatter and it is my pleasure to dedicate this text to her. Tatter has always been my bread mentor.
“Creating something from scratch is a beautiful thing. Being able to share your creation is a double pleasure. Baking at home for yourself or your beloved ones is always going to be well received. No matter what the outcome you can be sure that anything you make is going to be much fresher than what you can purchase in a supermarket(…)
Patience in baking is not a virtue: it is a necessity. A good baker can control the dough if they can control the environment where the dough is created. However, sometimes with baking, as with life, things don’t go to plan and you might have to follow the dough instead of leading it(…)
Bread baking is half science and half wild creation, which is its beauty. If you think a loaf of bread is ready to go in the oven from the techniques you have learned, but the recipe says hold it back another 10 minutes, throw the little bugger in the oven: trust yourself. The worst can happen is that you learn a little more from the experience(…)
Sourdough is the heart and soul of baking. Once people get a taste for sourdough, it’s hard to turn back. If you are looking for a wholesome, natural bread that has a low GI, without preservatives or additives than sourdough is the bread for you. Making sourdough bread will take time, but the labour is well worth the effort.” / Paul Allam & David McGuinness “Bourke Street Bakery”/
SIMPLE SOURDOUGH BREAD
Starter
30g fresh rye starter (sourdough) or 10g fresh yeast
150g lukewarm water
150g wholemeal rye flour
Mix together all the ingredients with a large spoon until it comes together to form a stiff dough. Give it a good stir, lightly grease a container with oil spray and sit the dough inside. Cover with plastic wrap and set aside at ambient room temperature for minimum 12 and up to 24 hours.
Main loaf
300g starter
700g strong white bread flour
150g wholemeal rye flour
500g lukewarm water
1 Tbsp salt
additional 10g fresh yeast if you use them instead of rye starter
Mix together all the ingredients until they come together to form a dough. Turn the dough out onto a clean work surface and knead into a ball with your hands, for about 10 minutes. Cover with plastic wrap and set aside to rest for 20 minutes.
Then knead it for a further 20 minutes or until it becomes smooth and elastic or until you would be able to stretch it out to transparency.
Lightly grease a container with oil spray and sit dough inside. Cover with plastic wrap and set aside at ambient room temperature for 1 hour to improve.
To knock back the dough, turn it out onto a lightly floured surface and press out onto rectangle, about 2.5cm thick. Use your hand to fold one-third back onto itself, then repeat with the remaining third. Turn the dough 90 degrees and fold it over again onto thirds. Place the dough back into the container and continue to bulk prove for a further 1 hour.
Divide the dough into two even-sized portion. Working with one portion at a time shape the doughs round or oblong and place them seam-side-up in the flour-dusted bread proving baskets (bannetons). Loosely cover both baskets with a plastic bag and leave for about 1 hour (for yeasted loaf) to 2 hours to rise. If the loaves push back steadily and quickly when you push lightly into them with a finger then they are ready,
Score the loaves, place them in the oven and bake for 20 minutes (240C) then turn them around and bake for further 20-25 minutes (200C), watching carefully to make sure that they do not burn.
Check the base of each loaf with a tap of your finger – if it sounds hollow, it is ready.
Cool on a wire rack.
Author: Ewelina Majdak
Photo © Ewelina Majdak – Around The Kitchen Table


